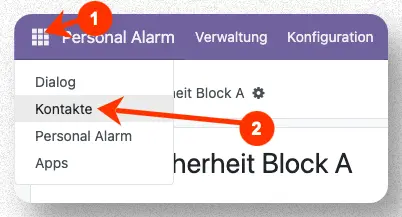
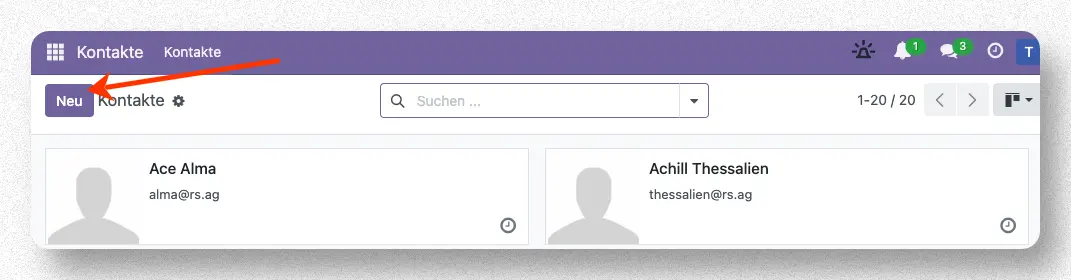
Create contacts for use in reporting chains
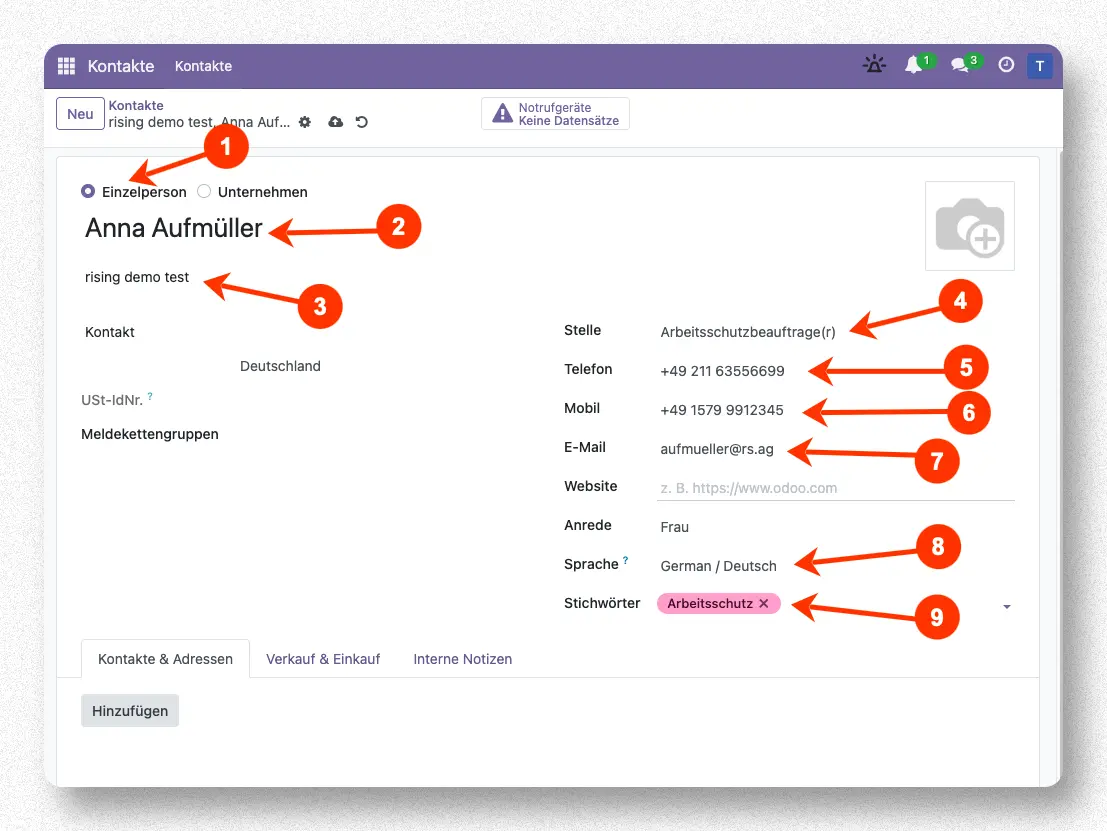
Subsequently, the form for maintaining a contact will open. The following fields should be filled in here (see screenshot).
- Contacts for reporting chains will generally be individuals. Therefore, the option "Individual" should be selected.
- Here, the name of the contact (first and last name) should be entered in a field.
- If multiple clients are used, the relevant client can be entered here if the contact belongs to the own company.
- Optionally, a description of the position can be entered.
- A landline phone number can be entered if the contact is to be reached via the telephone service on the landline.
- A mobile phone number can be entered if the contact is to be reached via the telephone service on the mobile phone or by SMS.
- An email address should be entered so that the contact can be notified via email.
- The user's language should be set accordingly.
- Optionally, keywords for contacts can be assigned to make them easier to manage.
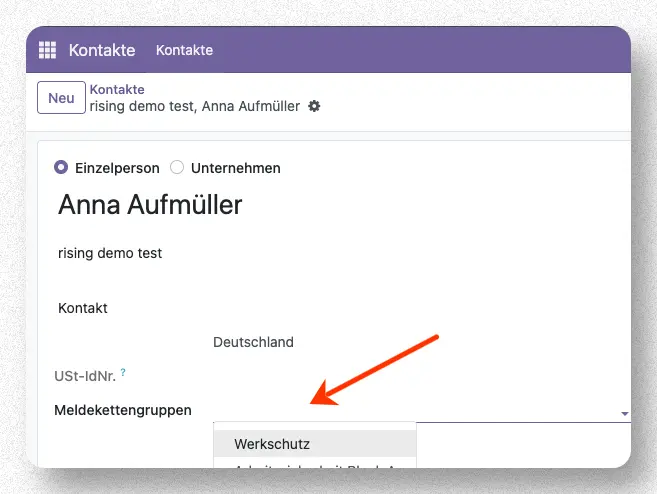
If a contact is to be added to an already existing reporting chain, this assignment can also be made directly in the contact form via the field "Reporting Chain Groups".
Create new reporting chain
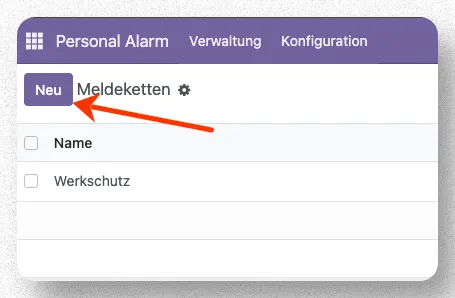
In the list view for reporting chains, you can create a new reporting chain by clicking the "New" button.
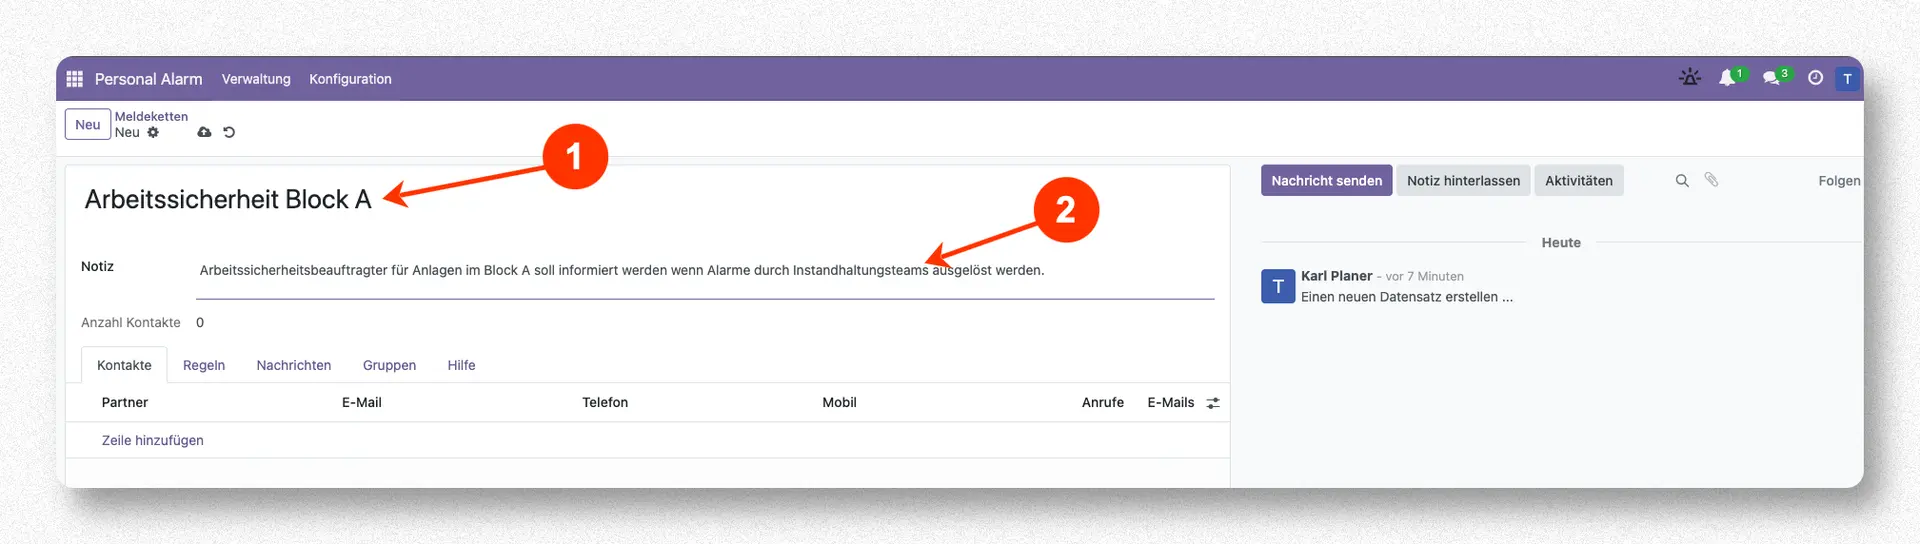
The form for configuring a reporting chain opens. A name must be assigned for each reporting chain (1), and an additional note, e.g., to explain the purpose of the reporting chain, can be added.
Add and manage contacts to a reporting chain
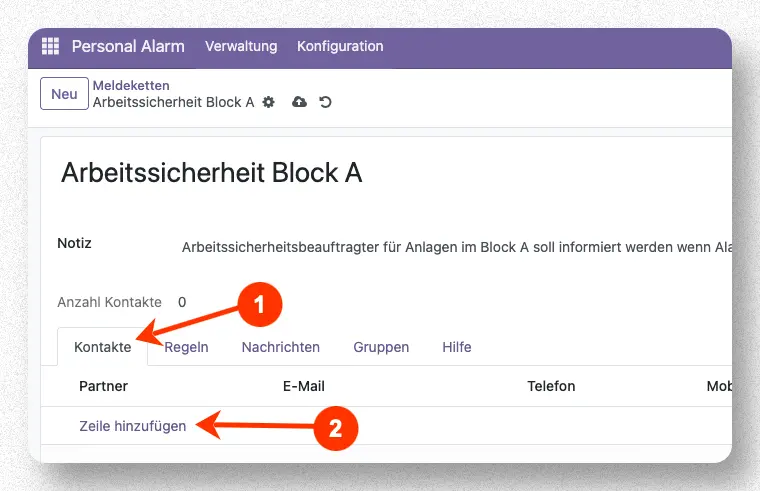
By clicking in the "Partner" field, a selection list opens from which an already established contact can now be selected.
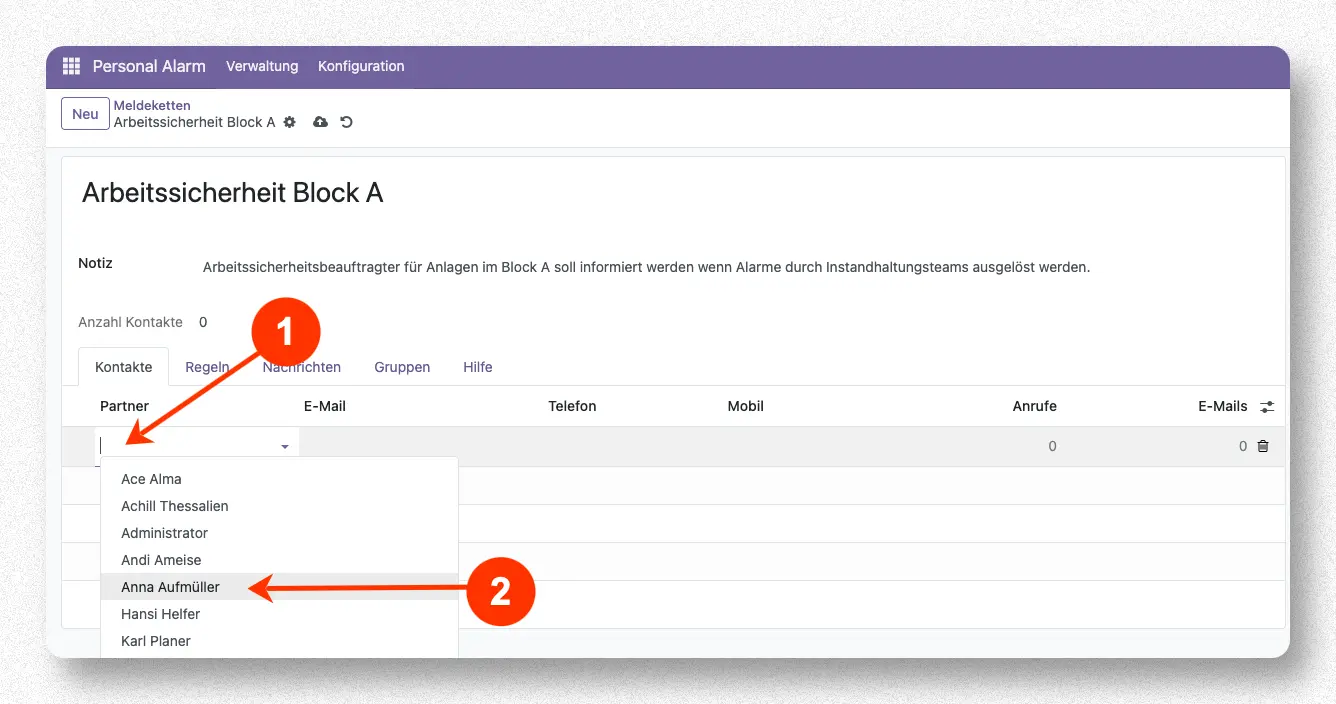
The relevant data of the contact for notification in the reporting chain is automatically taken from the existing contact. This includes email, phone number, and mobile number.

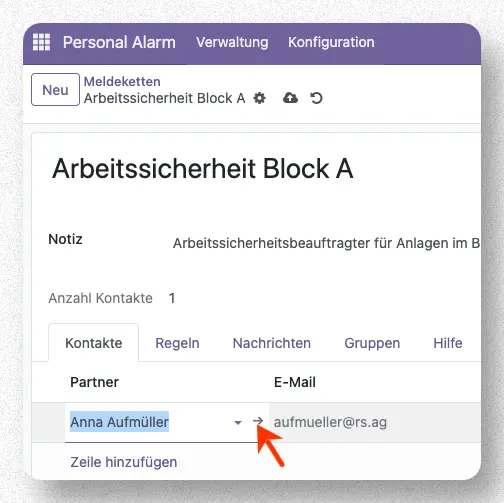
If relevant data is missing or incorrect for the selected contact, you can switch to the form view for the contact by clicking in the "Partner" field and then on the arrow behind the contact's name to make changes there.
The contacts in the notification chain are notified in the order they are listed from top to bottom. Changing the order is possible by grabbing a contact with the “Move” icon in front of the contact's name and dragging it up or down in the list.
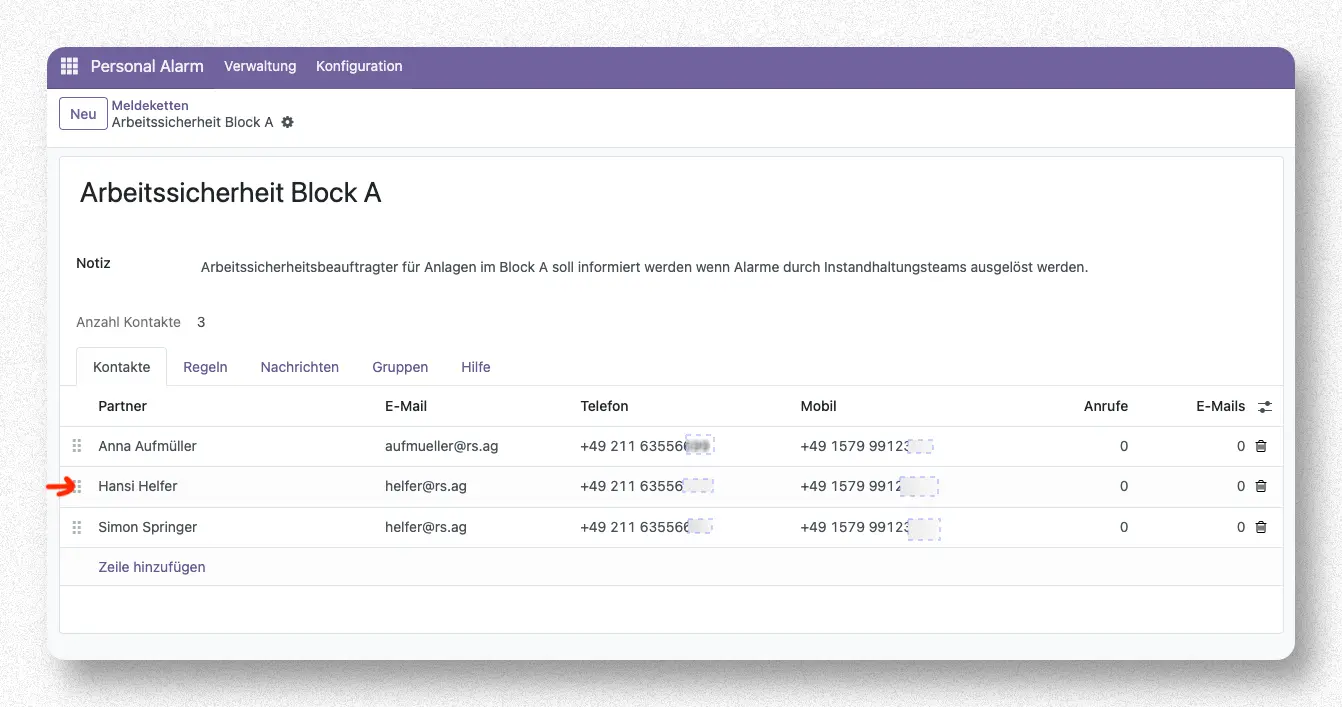
Here is an example of the changed order.

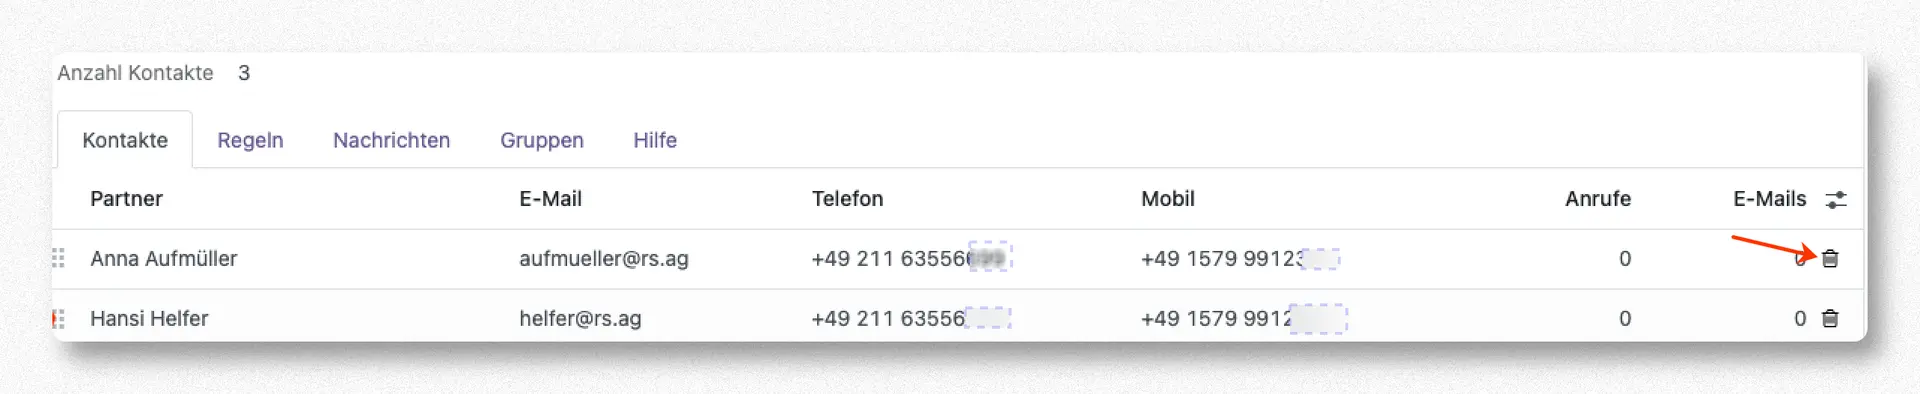
If necessary, contacts can also be removed from the notification chain by clicking on the trash can icon at the end of the contact entry.
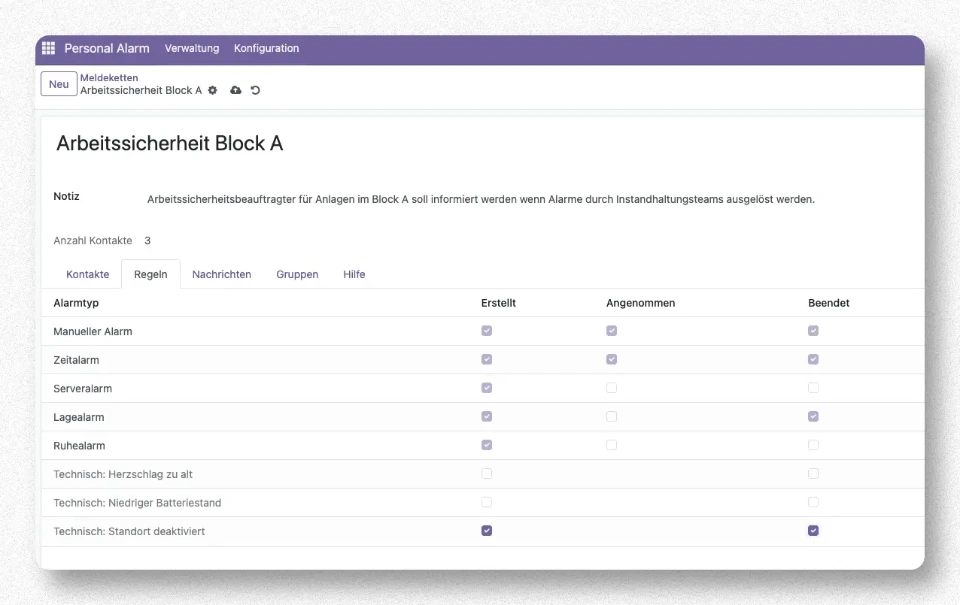
Configure notification rules
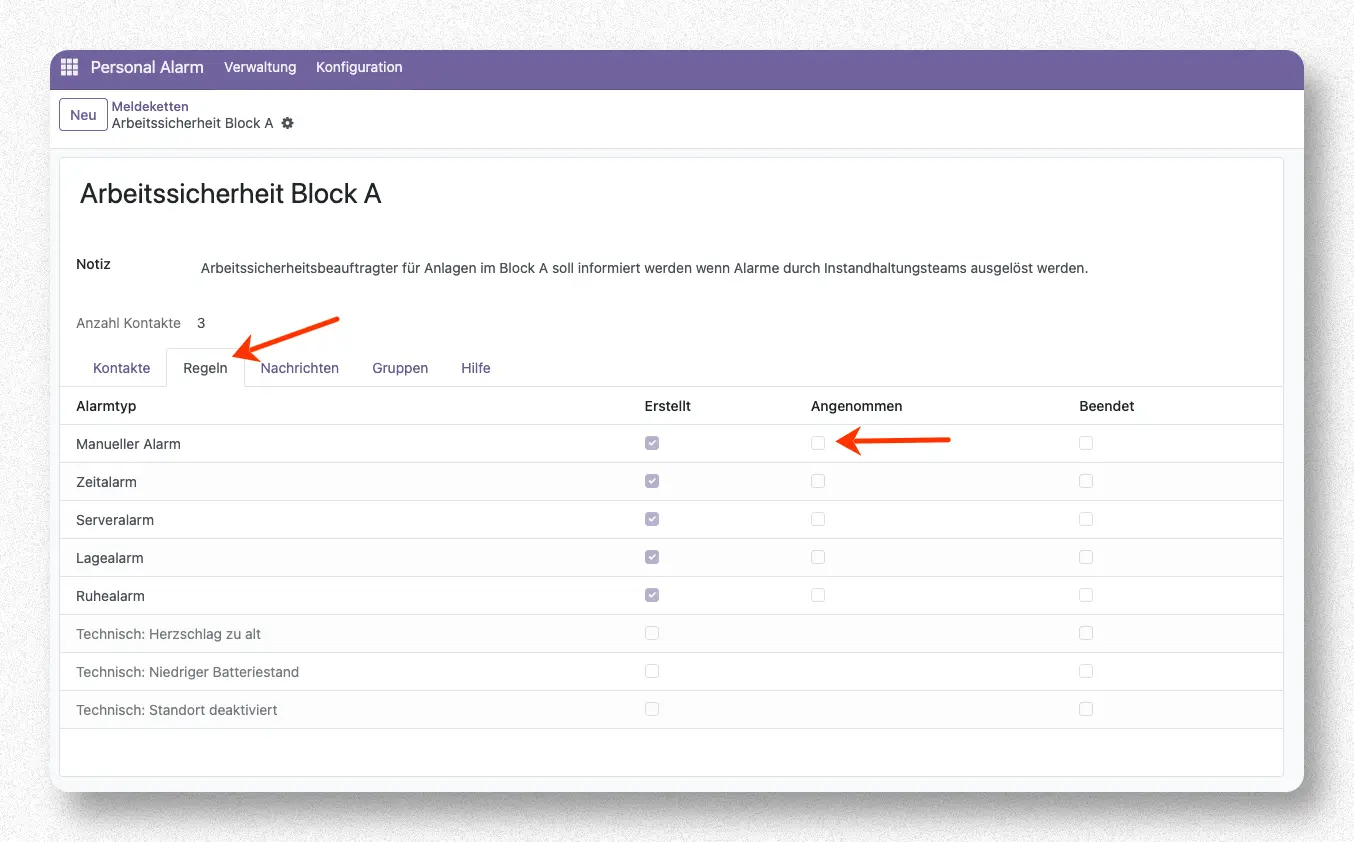
Here is a sample scenario for setting a rule. If the notification group should not only be informed when a “Manual Alarm” is triggered on one of the PNG devices, but also when a first responder has accepted the emergency call, then you additionally check the box in the “Accepted” column for the “Manual Alarm” row. If the notification chain should also be notified when the “Manual Alarm” for the triggering PNG device is ended, then the checkbox for the “Ended” event must also be checked in the same row.
In addition to the normal alarm types, there are also technical alarm types such as "Heartbeat too old" (the device has not sent any technical "sign of life" to the receiving unit beyond a predefined duration), "Low battery" (the battery charge of a PNG device has fallen below a predefined minimum value), and "Location disabled" (the location data for a PNG device has been disabled, and the location of the monitored person can no longer be determined). For technical alarm types, it can also be defined whether the reporting chain is notified upon the creation and/or termination of the event.
Configure messages for events
For each type of event, it is possible to create a specific message text that will be sent to the contacts in the reporting chain in the event of the occurrence of the respective event. The texts for the messages can be maintained via the "Messages" tab. By default, a standard text for all three possible events is already stored for each new group.
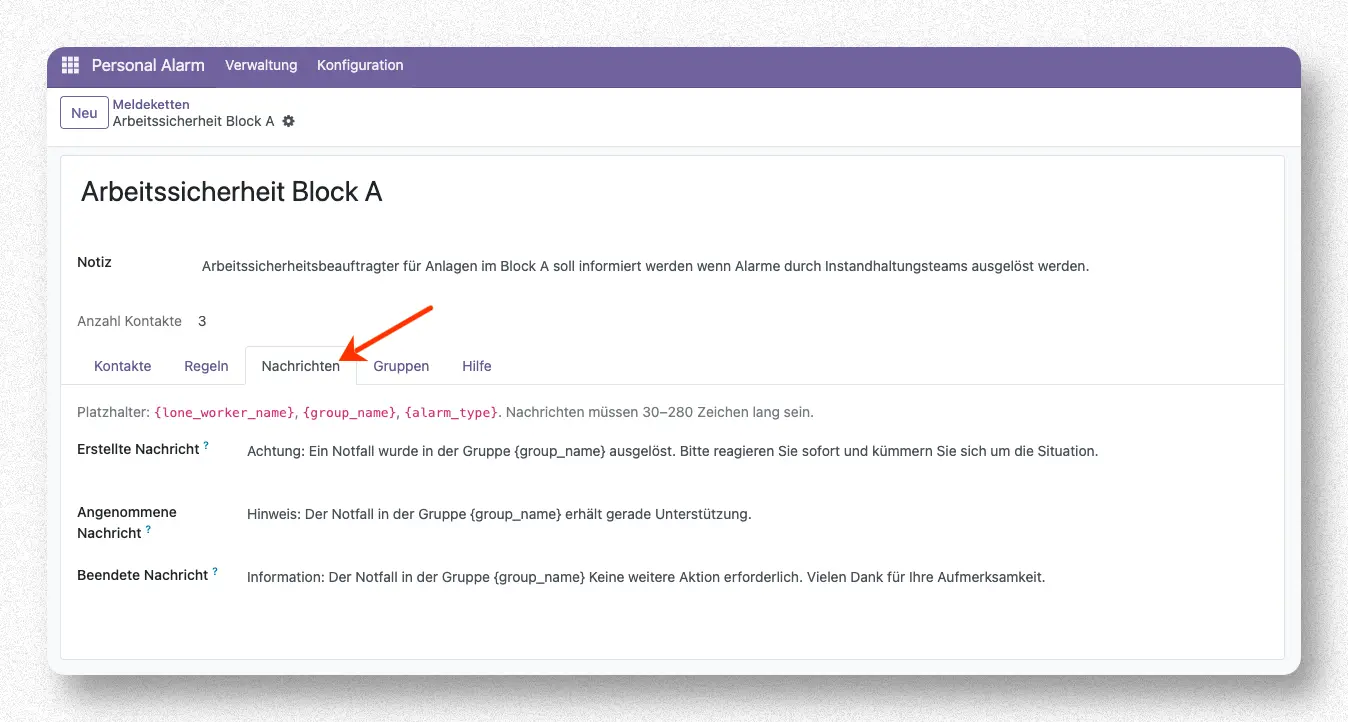
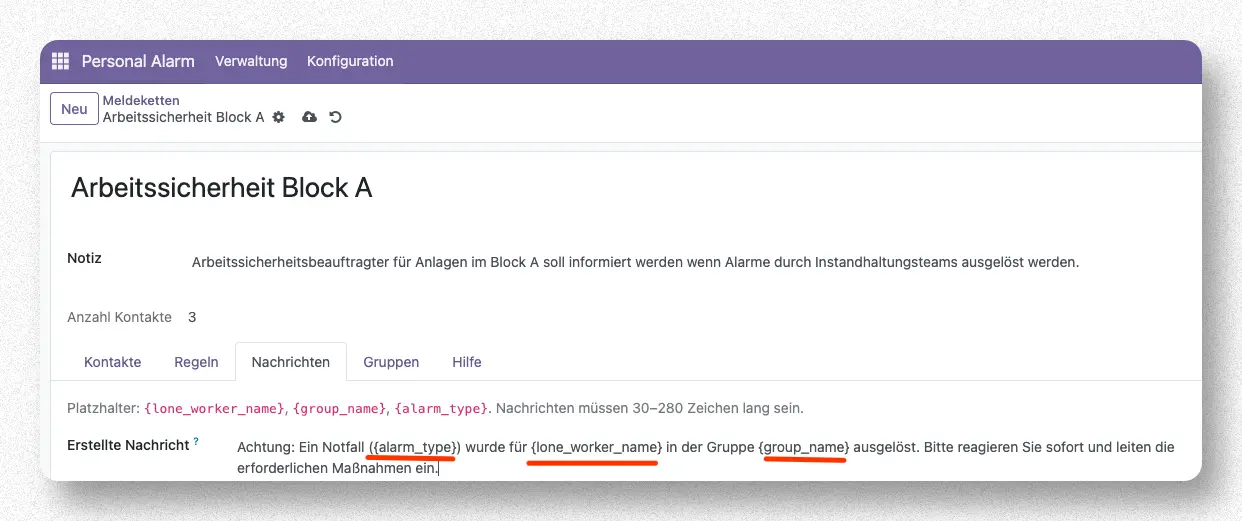
Messages can have a length between 30 and 280 characters. In a message, the texts can be adapted to the specific situation using placeholder variables. The following placeholders are available:
- {lone_worker_name} = Name with which a person using the alarm-triggering PNG device has logged into the app.
- {group_name} = Name of the device group in which the alarm was triggered.
- {alarm_type} = Type of the alarm that was triggered (e.g., Manual Alarm).
Assignment of reporting chains to device groups
A notification chain can be assigned to one or more device groups. If an alarm is triggered in the assigned device groups, the notification of the reporting group will occur.
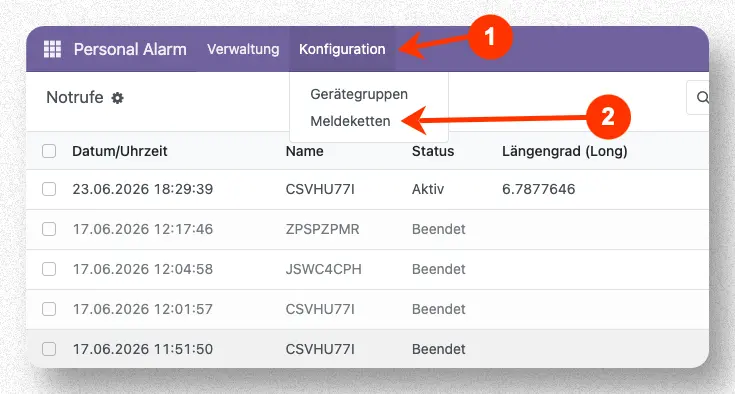
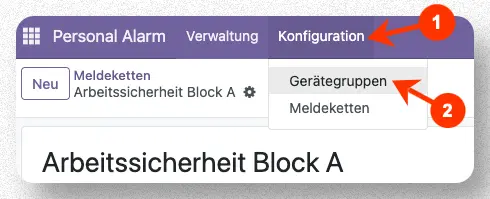
The assignment of a notification chain to a device group is done through the respective device group. To configure the device groups, you go to the menu "Configuration" (1) and select the entry "Device Groups" (2).
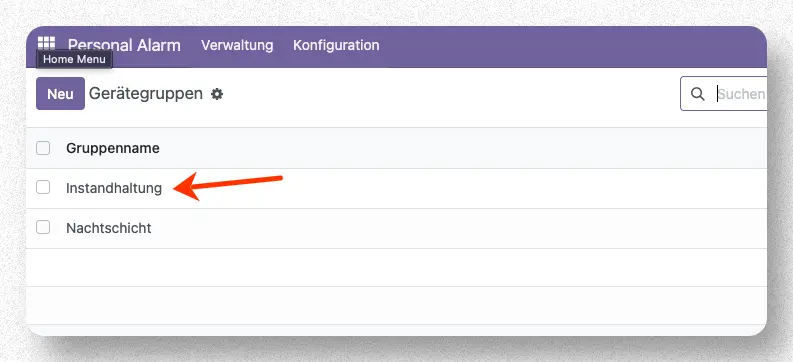
By clicking on a device group in the list of device groups, the editing form for this group opens.
At the end of the form for the device group, you open the tab "Notification Chains" (1). Here you can assign a notification chain to the device group by clicking on "Add Row" (2).

The selection dialog for adding notification chains opens. To assign one or more notification chains, you activate the check box in front of the respective notification chain entry (1) and then confirm the selection with the button "Select".

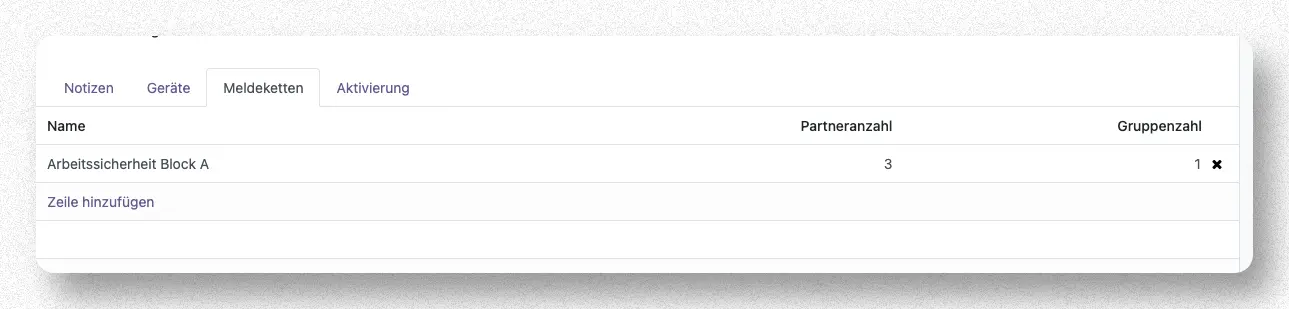
The notification chain now appears in the list of assigned notification chains.
If you go back to the notification chain itself, you can see on the tab "Groups" (1) which device group (2) a notification chain is already assigned to.
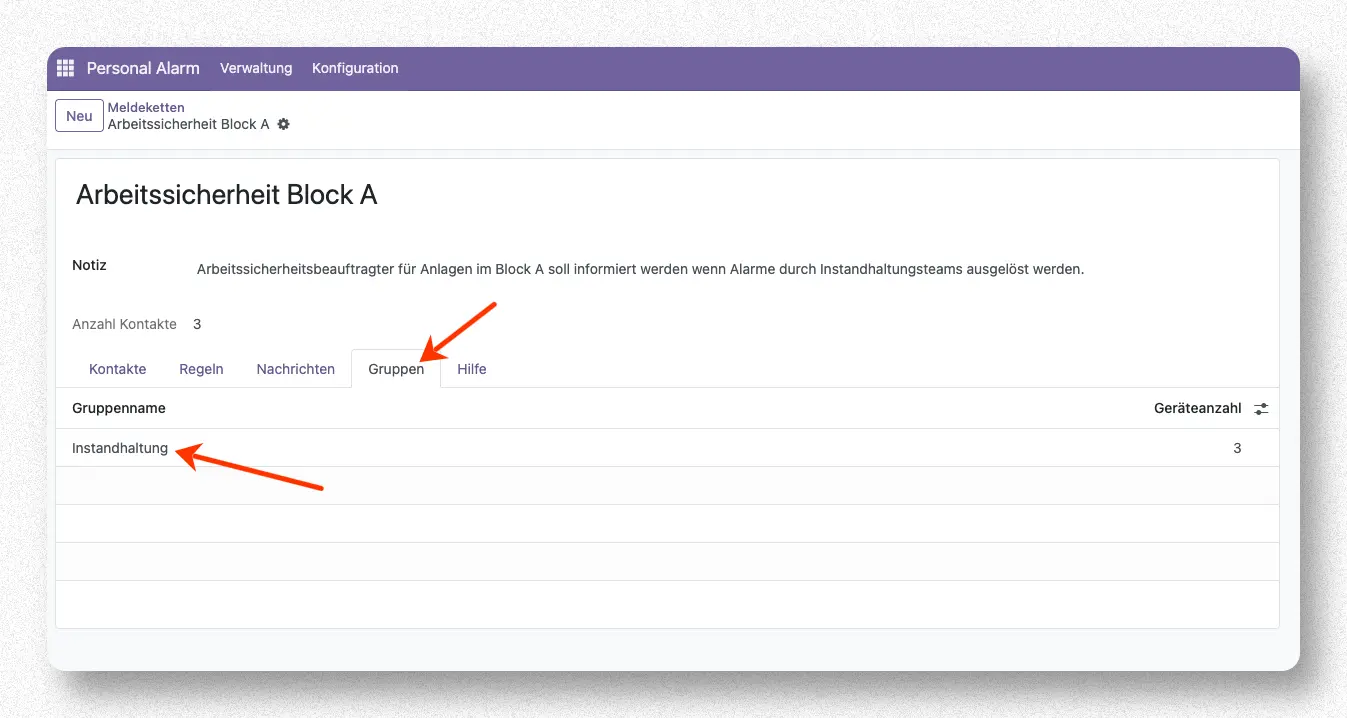
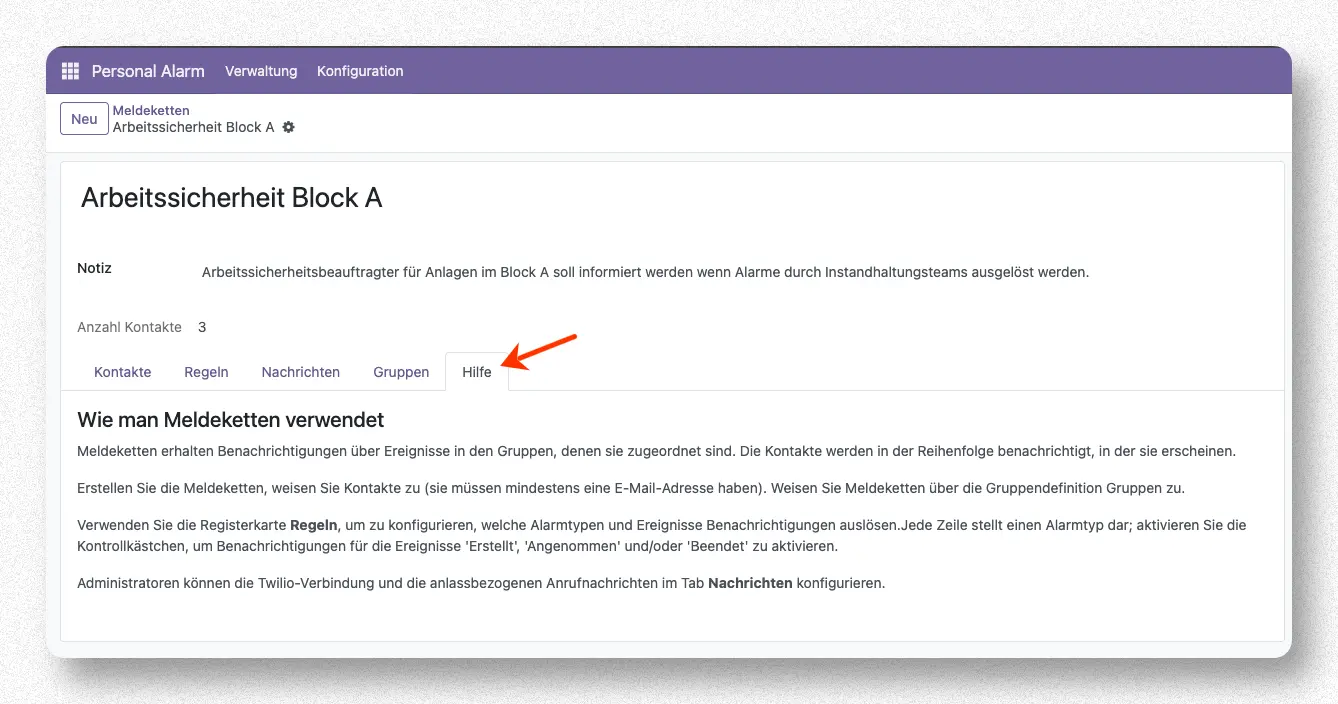
On the tab "Help", there is also a brief summary of the instructions for using the notification chains.
Notification
If the notification of the notification chain is triggered, the stored contacts will be informed in order from top to bottom.
Email Notification
If an email address has been stored for a contact, an email will be sent to the contact informing them about the event and the affected group.
Phone Notification
To use the telephone notification, an automatic call service must be set up for the respective RS Personal Alarm System. The setup of the call service is usually done by the administrator.
If a phone number and/or mobile number has been provided for a contact, a call will be triggered in addition to the email. If this call is answered, an automatic announcement will be made with the text stored in the configured messages. If the call is not answered, an SMS message will be sent to the respective phone number, containing the configured message.